How to embed ConvertKit newsletter with invisible reCAPTCHA on Hashnode blog

Hashnode is the perfect blogging platform if you’re a developer and you want more freedom and control. In my opinion, one of the biggest advantages is to be able to use your own domain for your blog on Hashnode. It also has built-in support for a simple mailing list.
But maybe you want to use a 3rd party mailing list provider like Mailchimp, Mailerlite or ConvertKit, to have even more control over your subscriber’s emails and lists.
In this article, I’m going to explain how to use a Hashnode widget feature to include a ConvertKit signup form pretty much anywhere on your blog site.
Why ConvertKit?
Of course, you can use any mailing list provider you choose that works for you and the process is the same as described in this article.
I chose to use ConvertKit because of its simplicity, the fact that it has invisible reCaptcha support, and has a free plan for up to 1000 subscribers. Google’s reCaptcha these days is a must to prevent bots from signing up to the mailing list in bulk and filling up your quota.
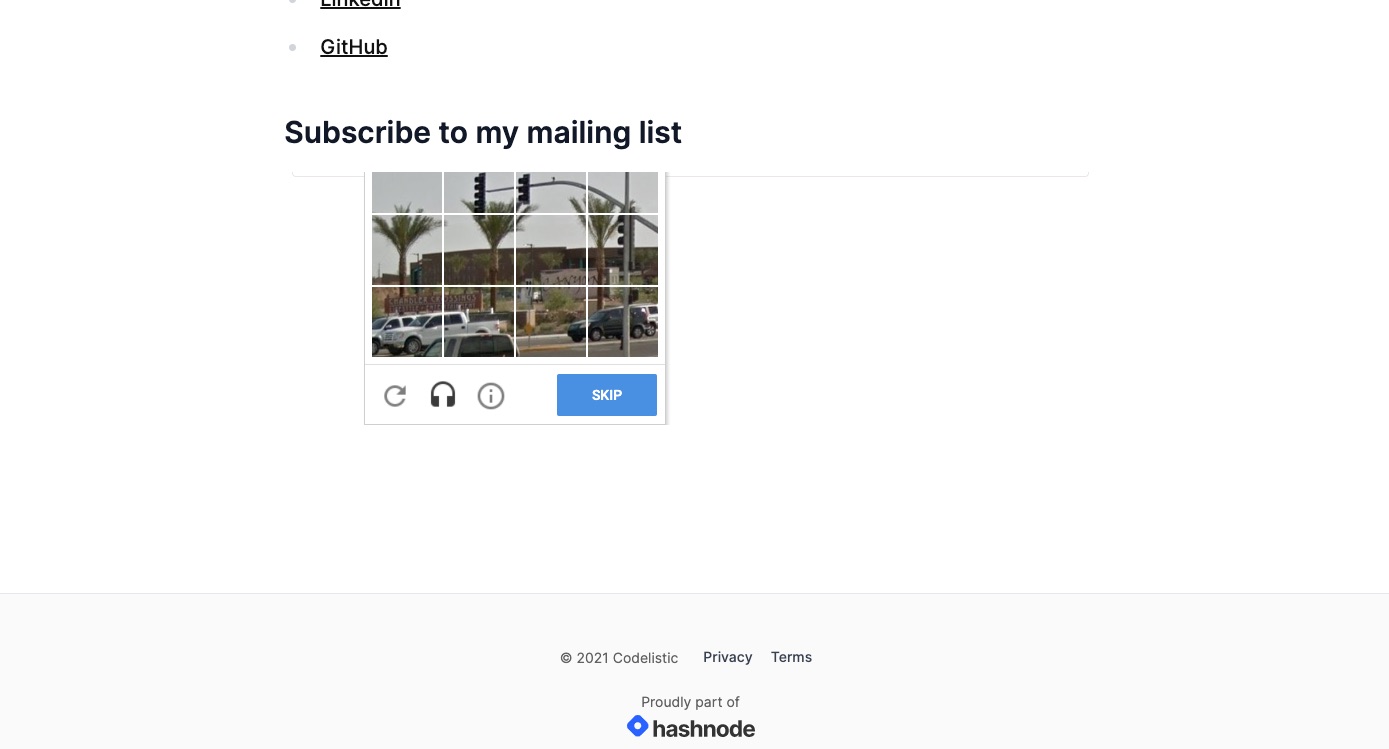
I tried using Mailerlite, but it doesn’t have invisible reCaptcha, which means when people subscribe using the signup form, there is a popup that opens on top of the signup form with an image recognition challenge. This was a problem for me because it was both breaking the layout within the blog site and because it creates more friction for the user to sign up.
MailerLite form’s reCaptcha challenge breaking the layout:
Enabling invisible reCAPTCHA in ConvertKit
I will avoid explaining how to create the signup form itself in ConvertKit in this article, but it’s a really simple process. One thing to make sure to do is to enable invisible reCaptcha for your signup form in ConvertKit for extra security.
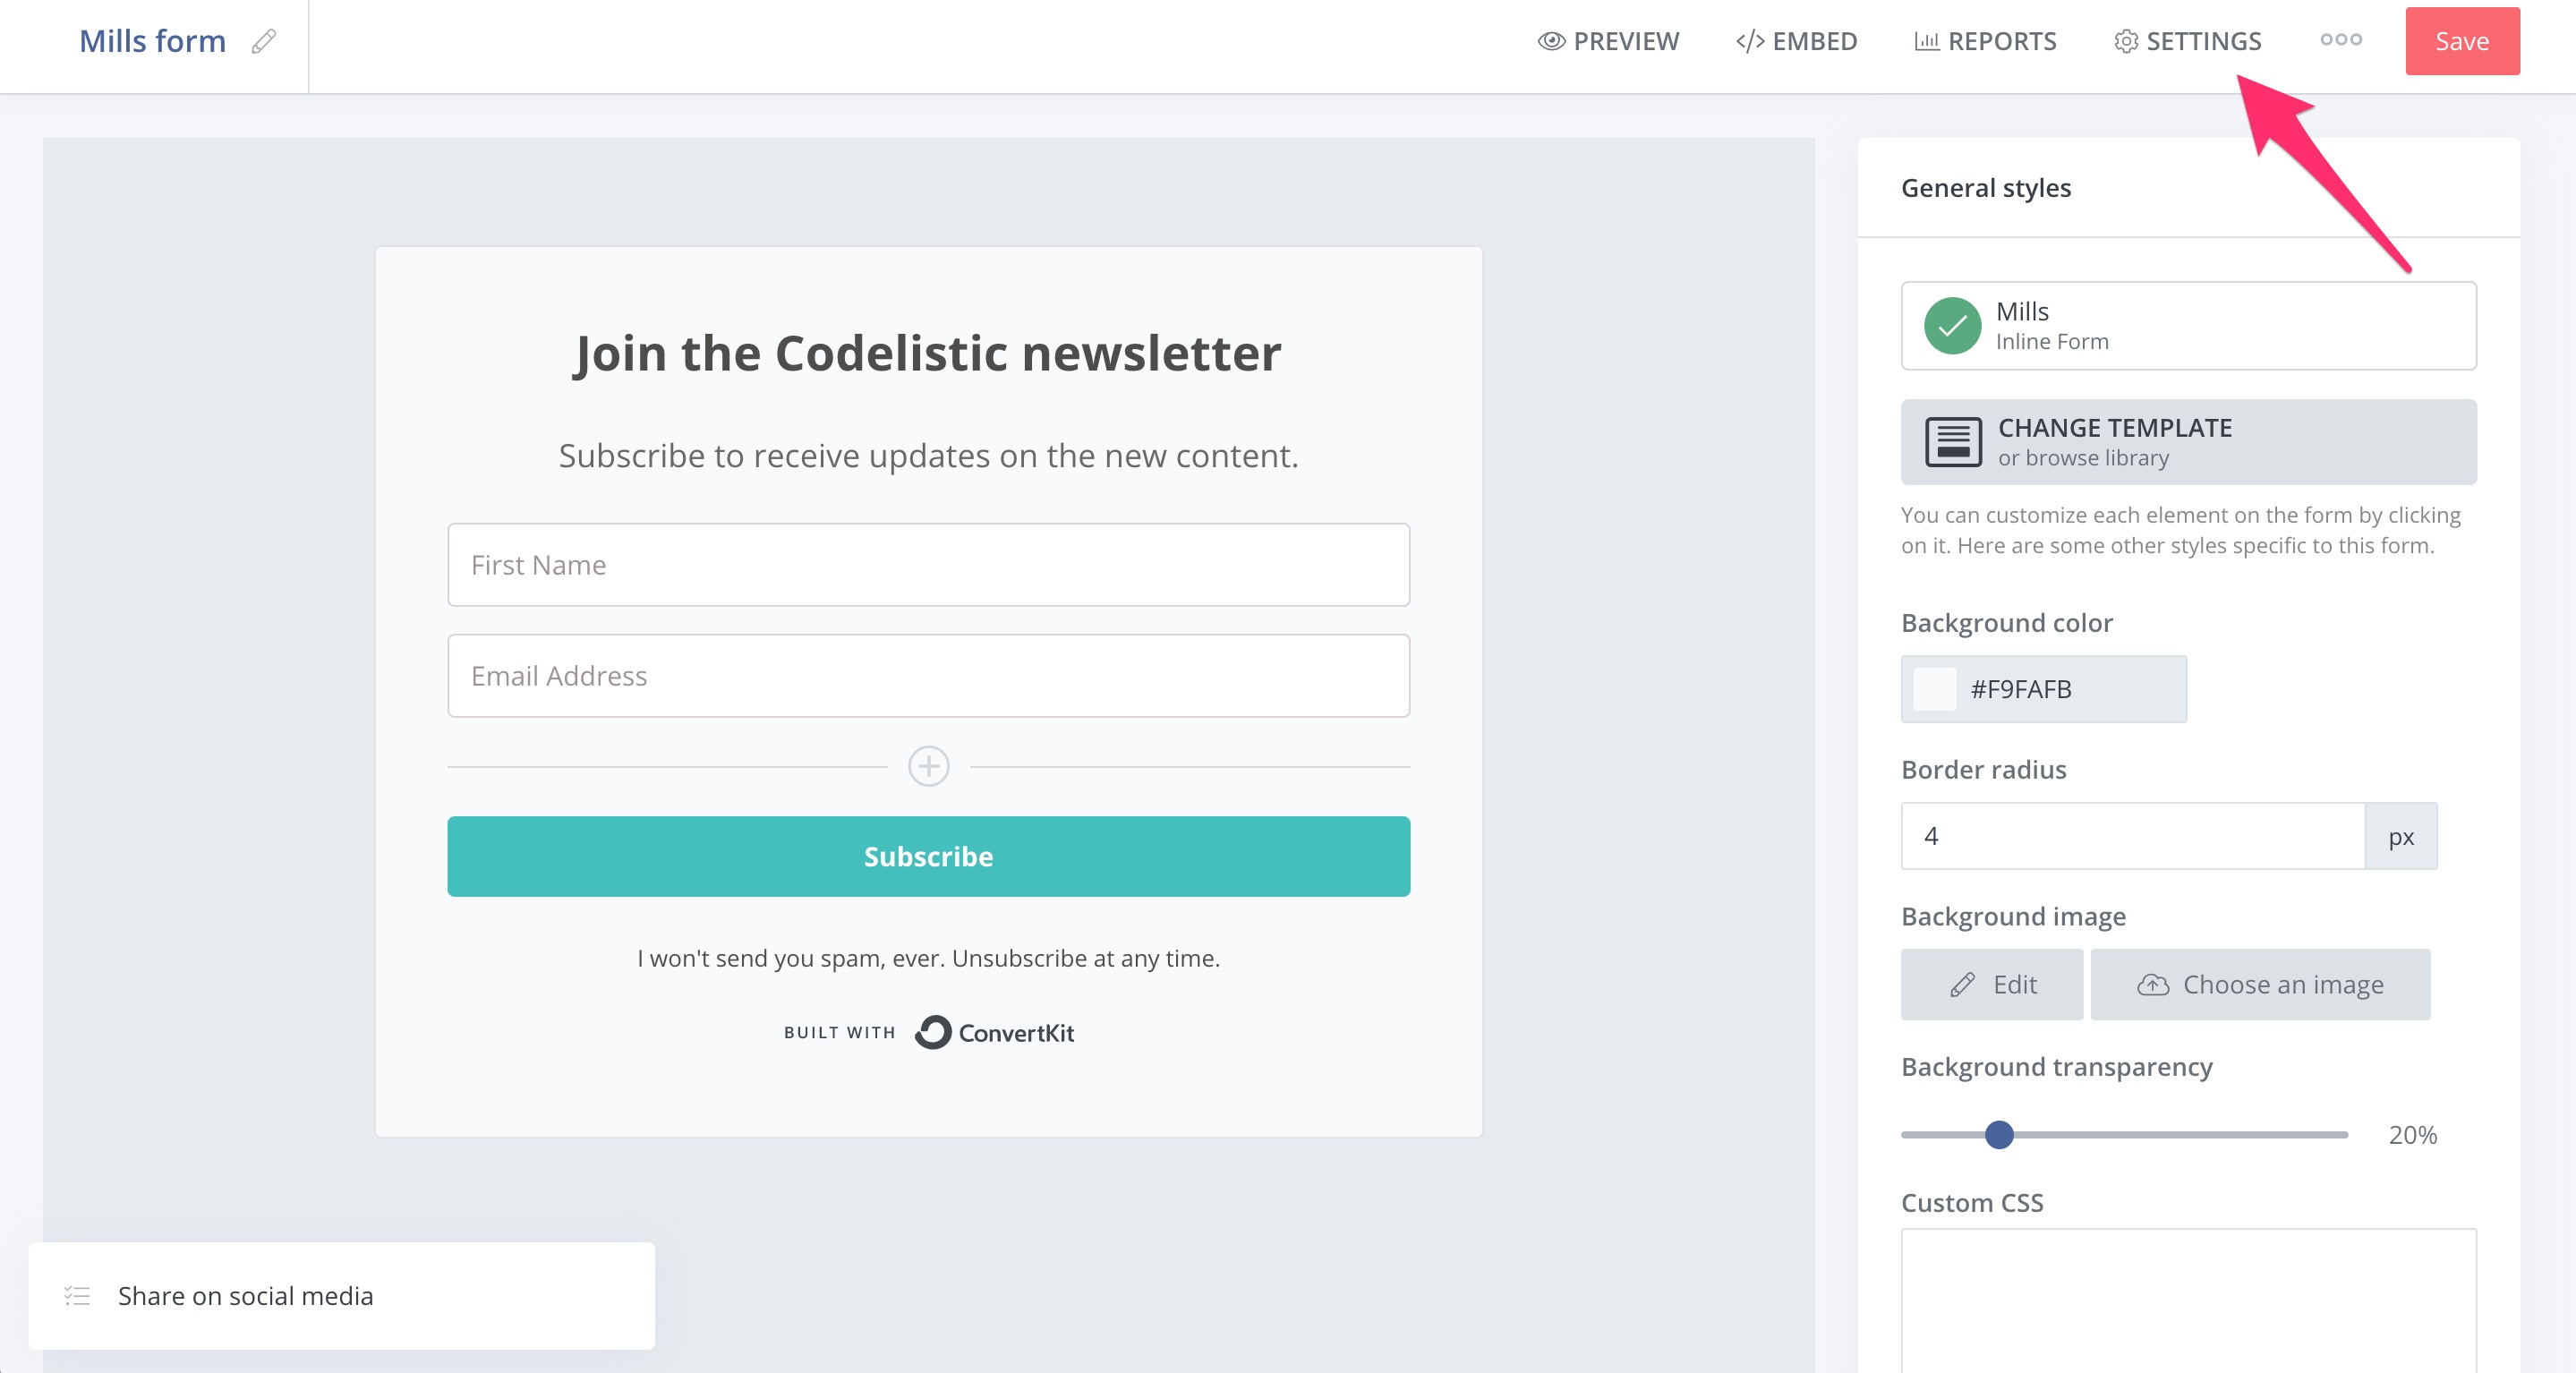
This is how you do it in ConvertKit. First, go to the Settings of your signup form:
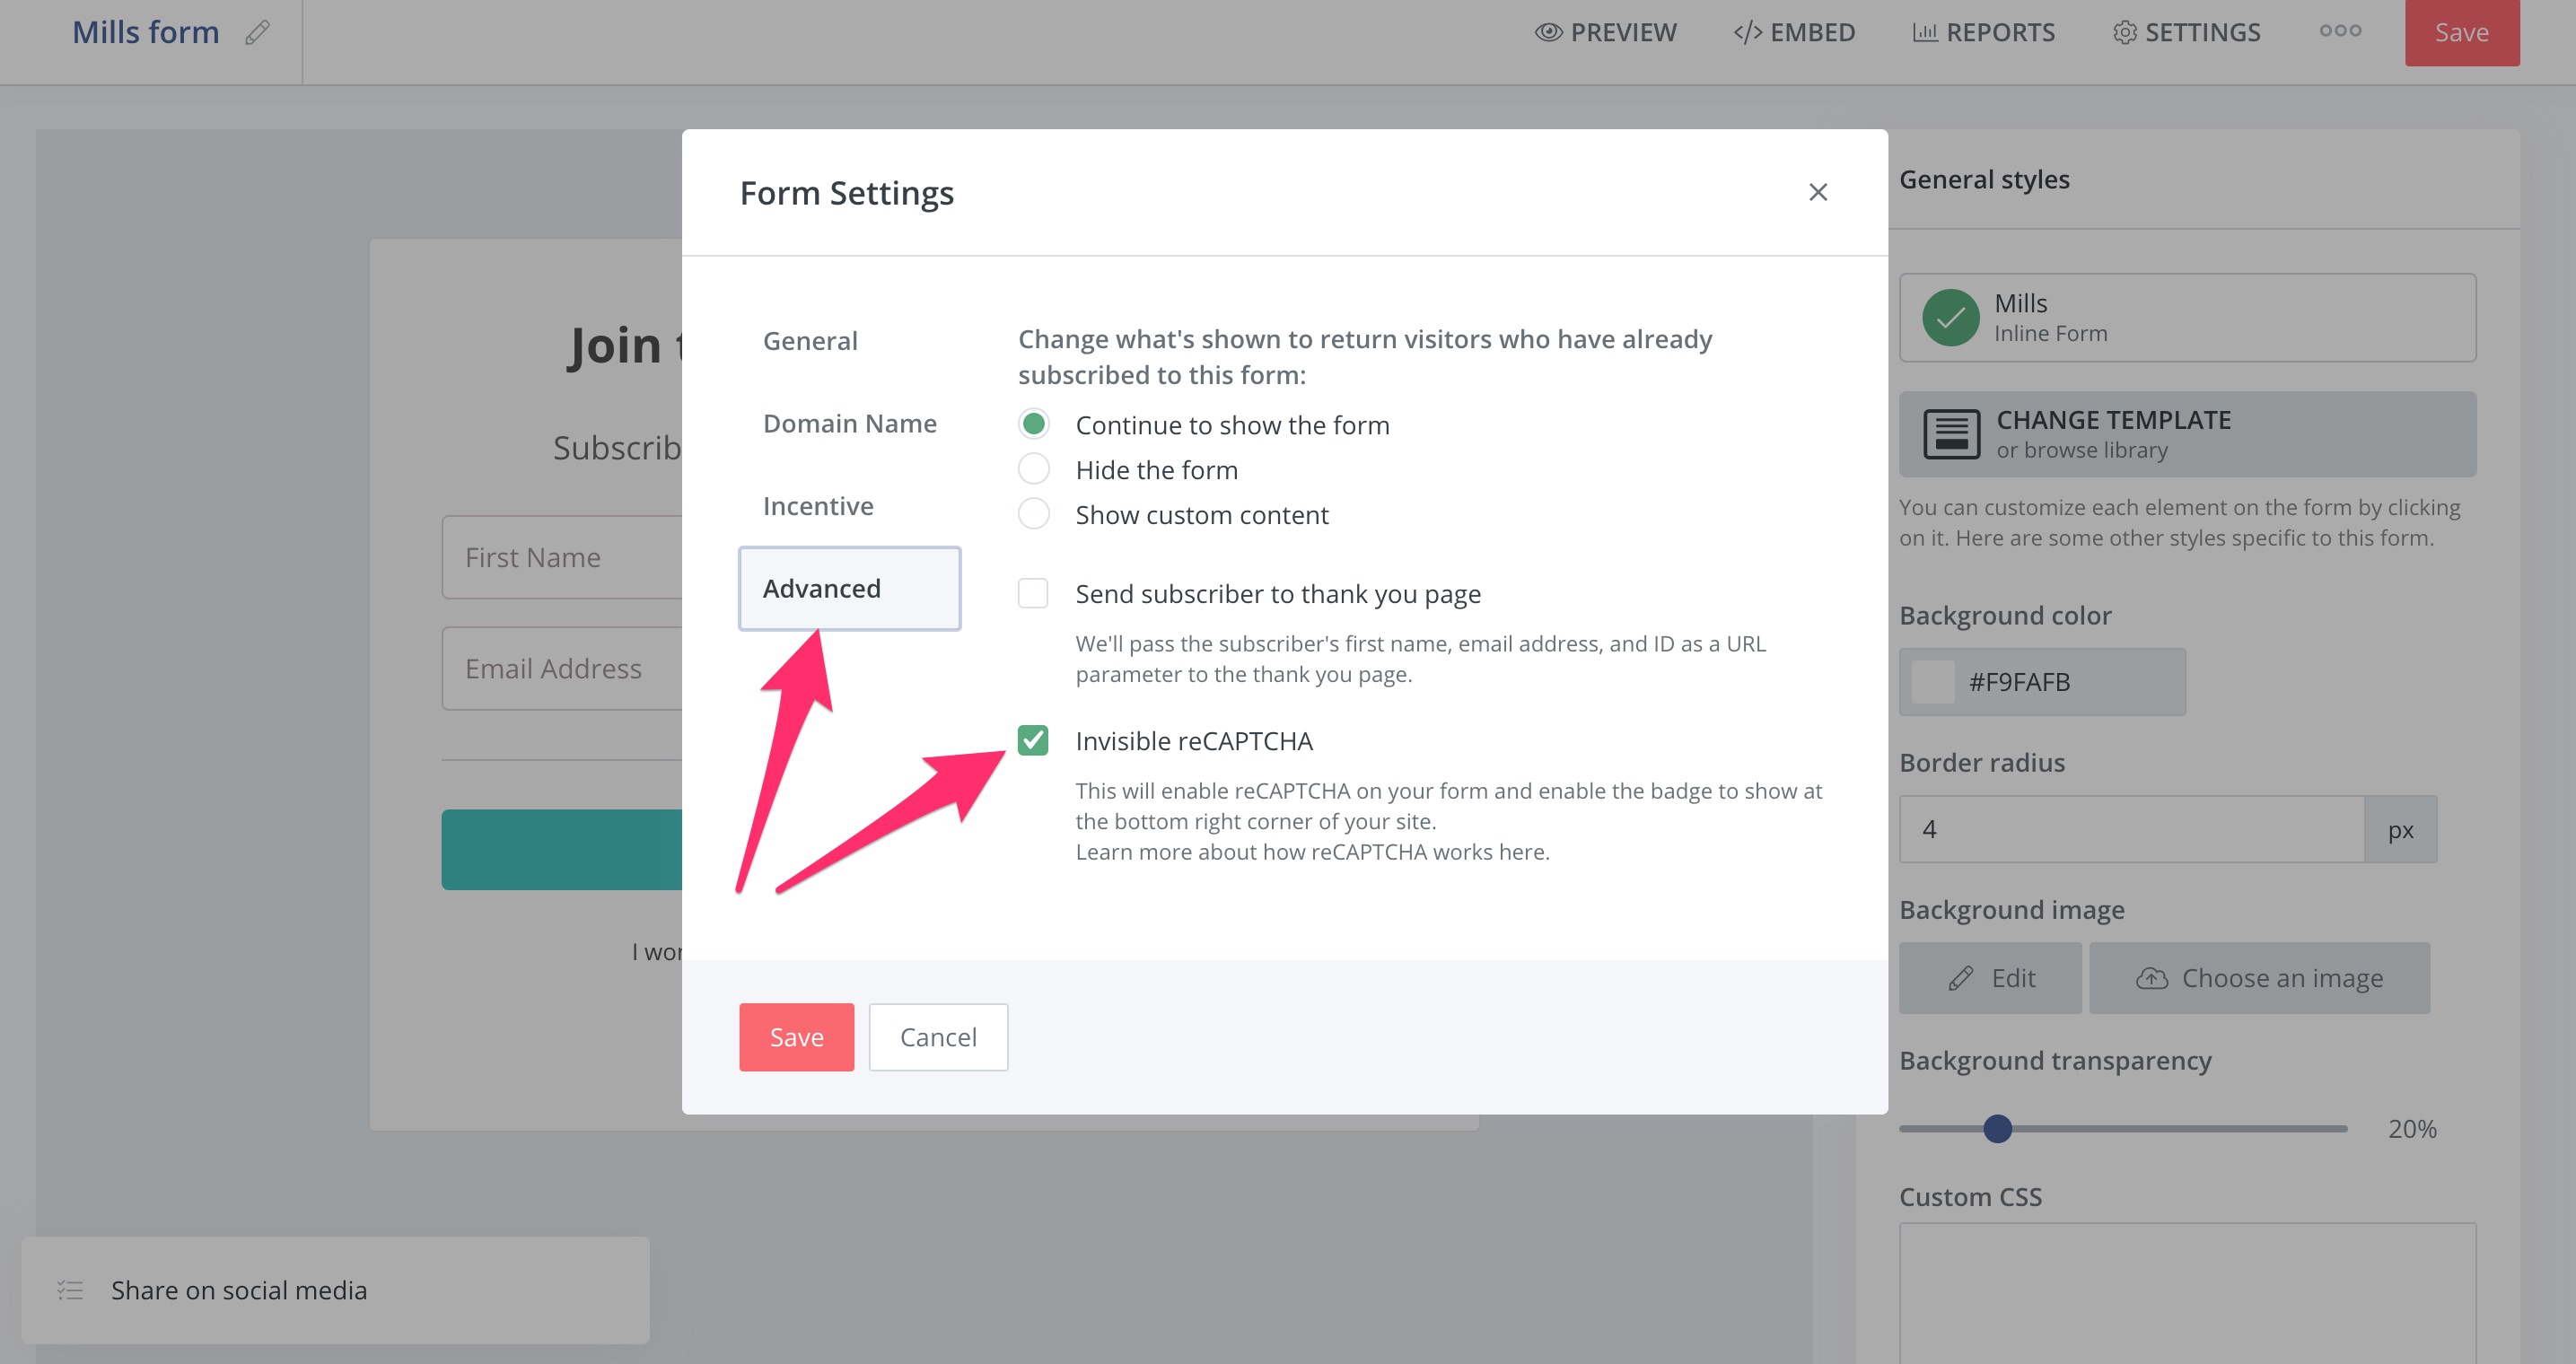
Then, click on Advanced tab, tick the Invisible reCAPTCHA checkbox and click Save button to confirm:
Copy the embed code from your ConvertKit form
Now it’s time to get the embed code of your signup form, so you can use it on your Hashnode blog.
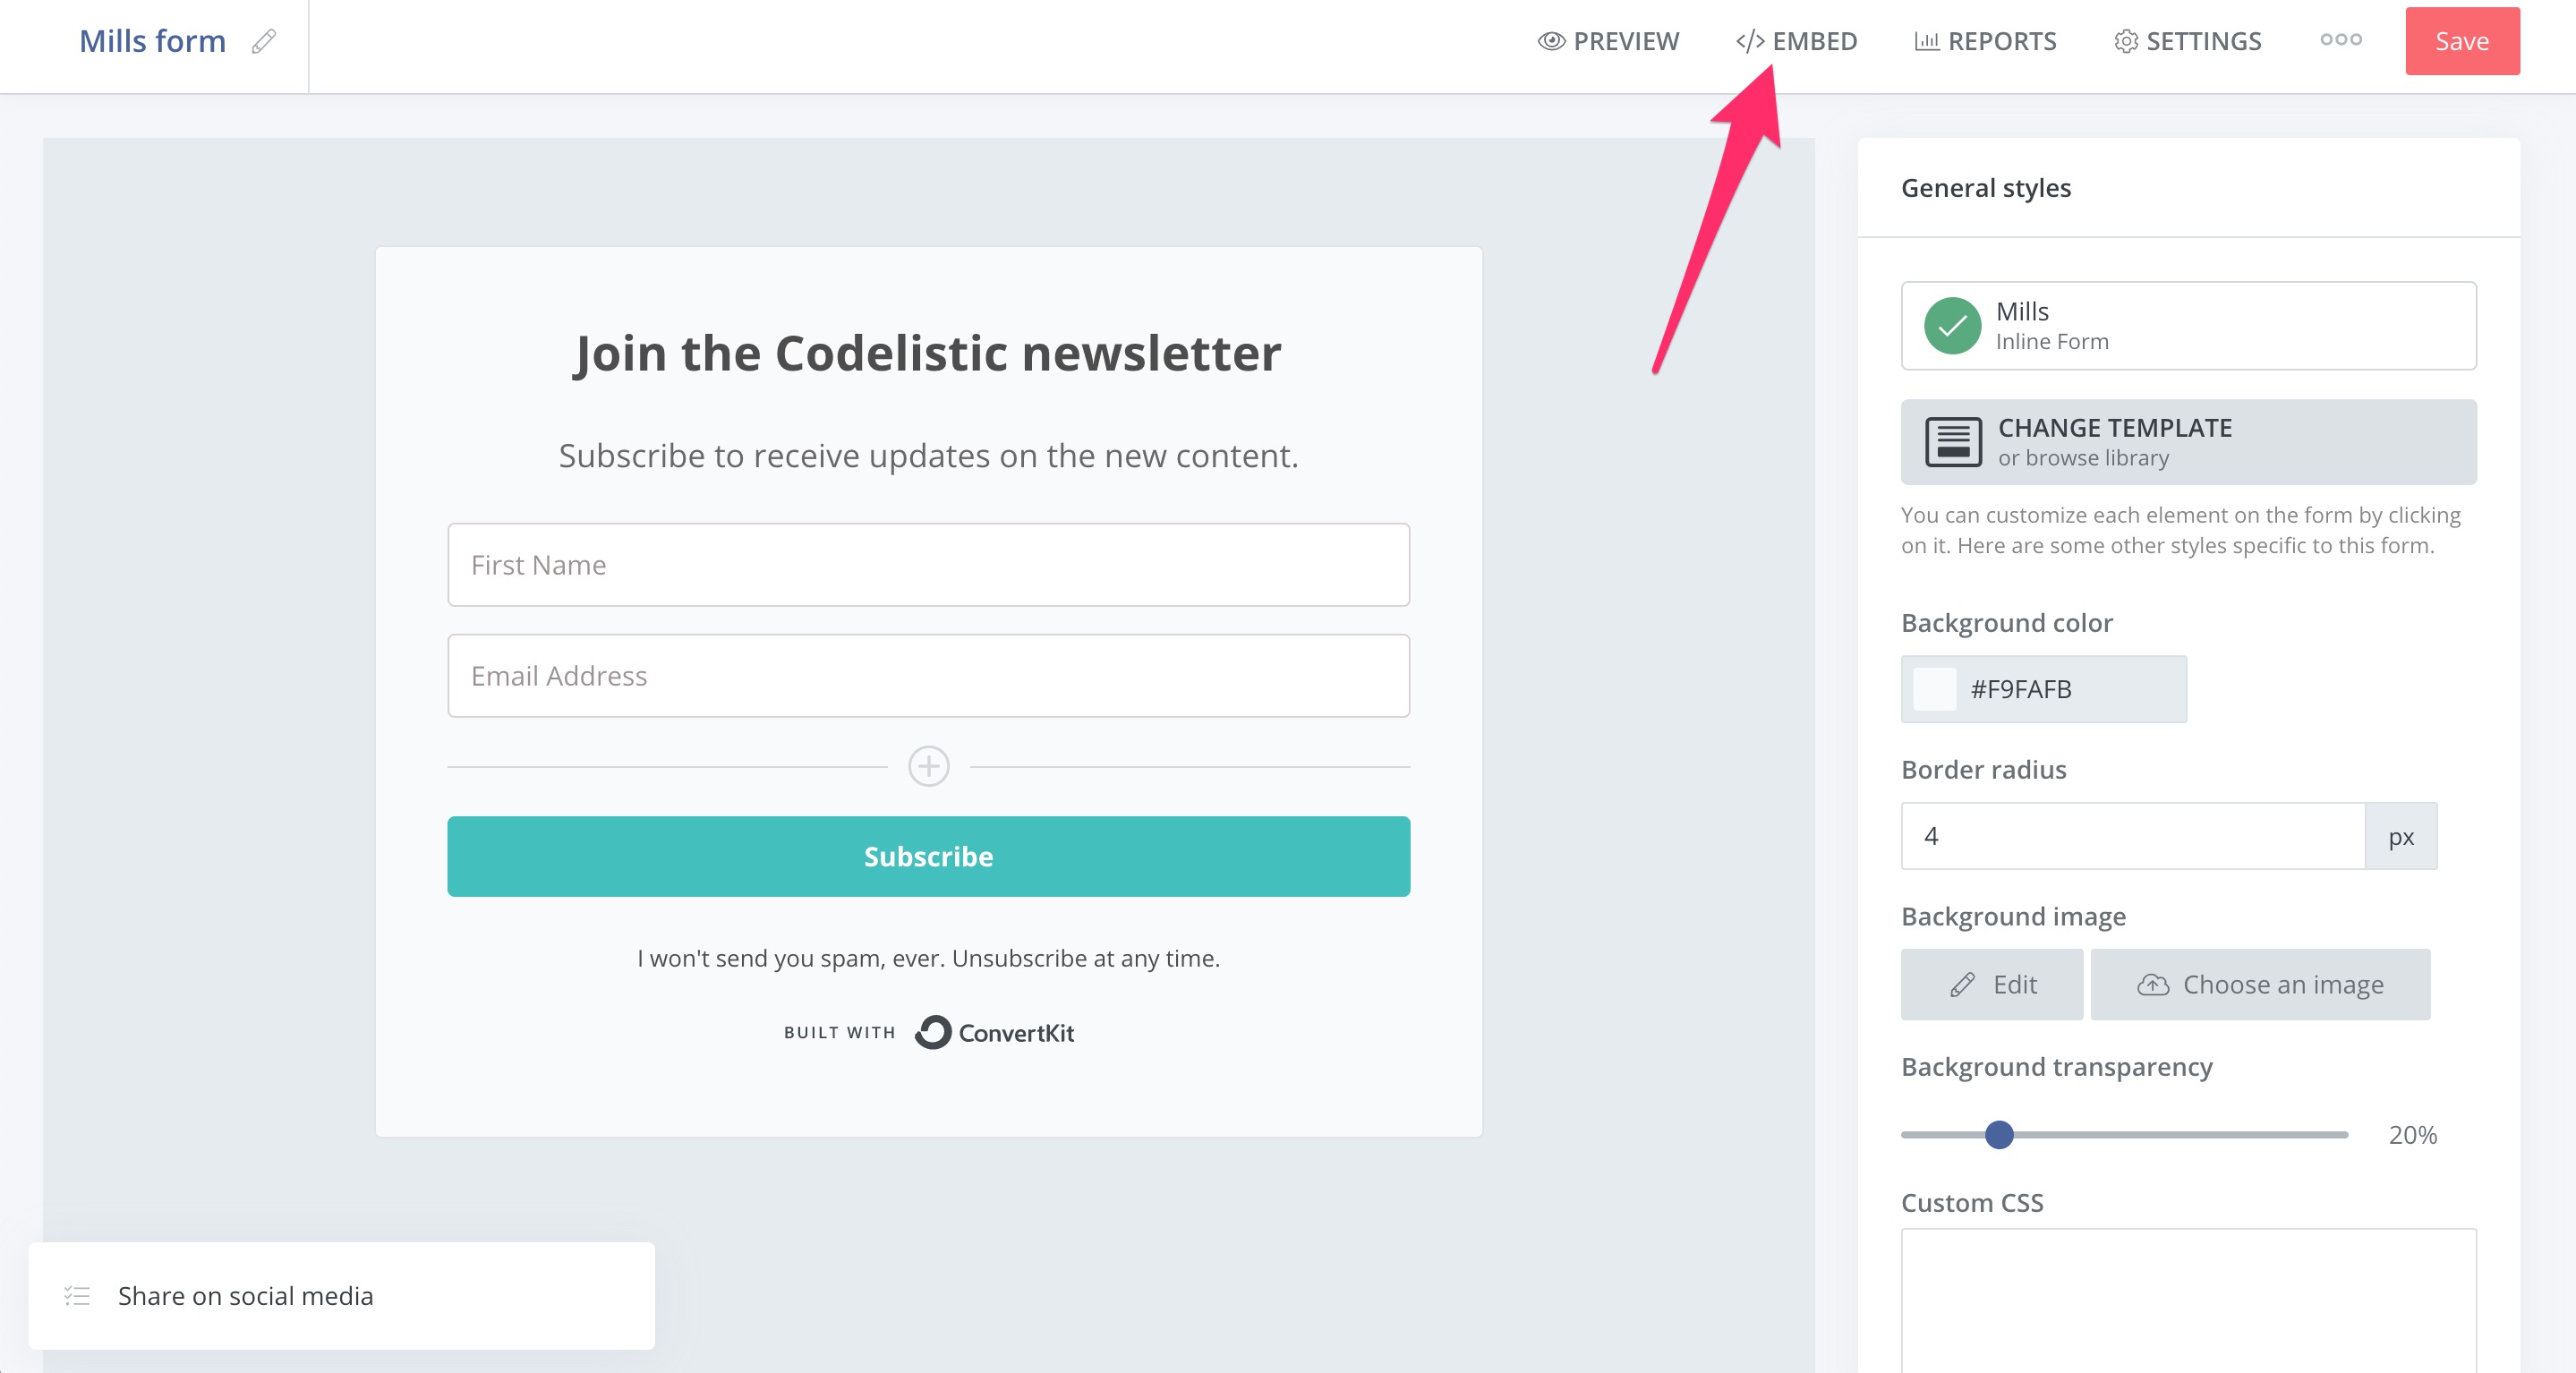
Notice the EMBED button in the bar above the signup form, so click on it:
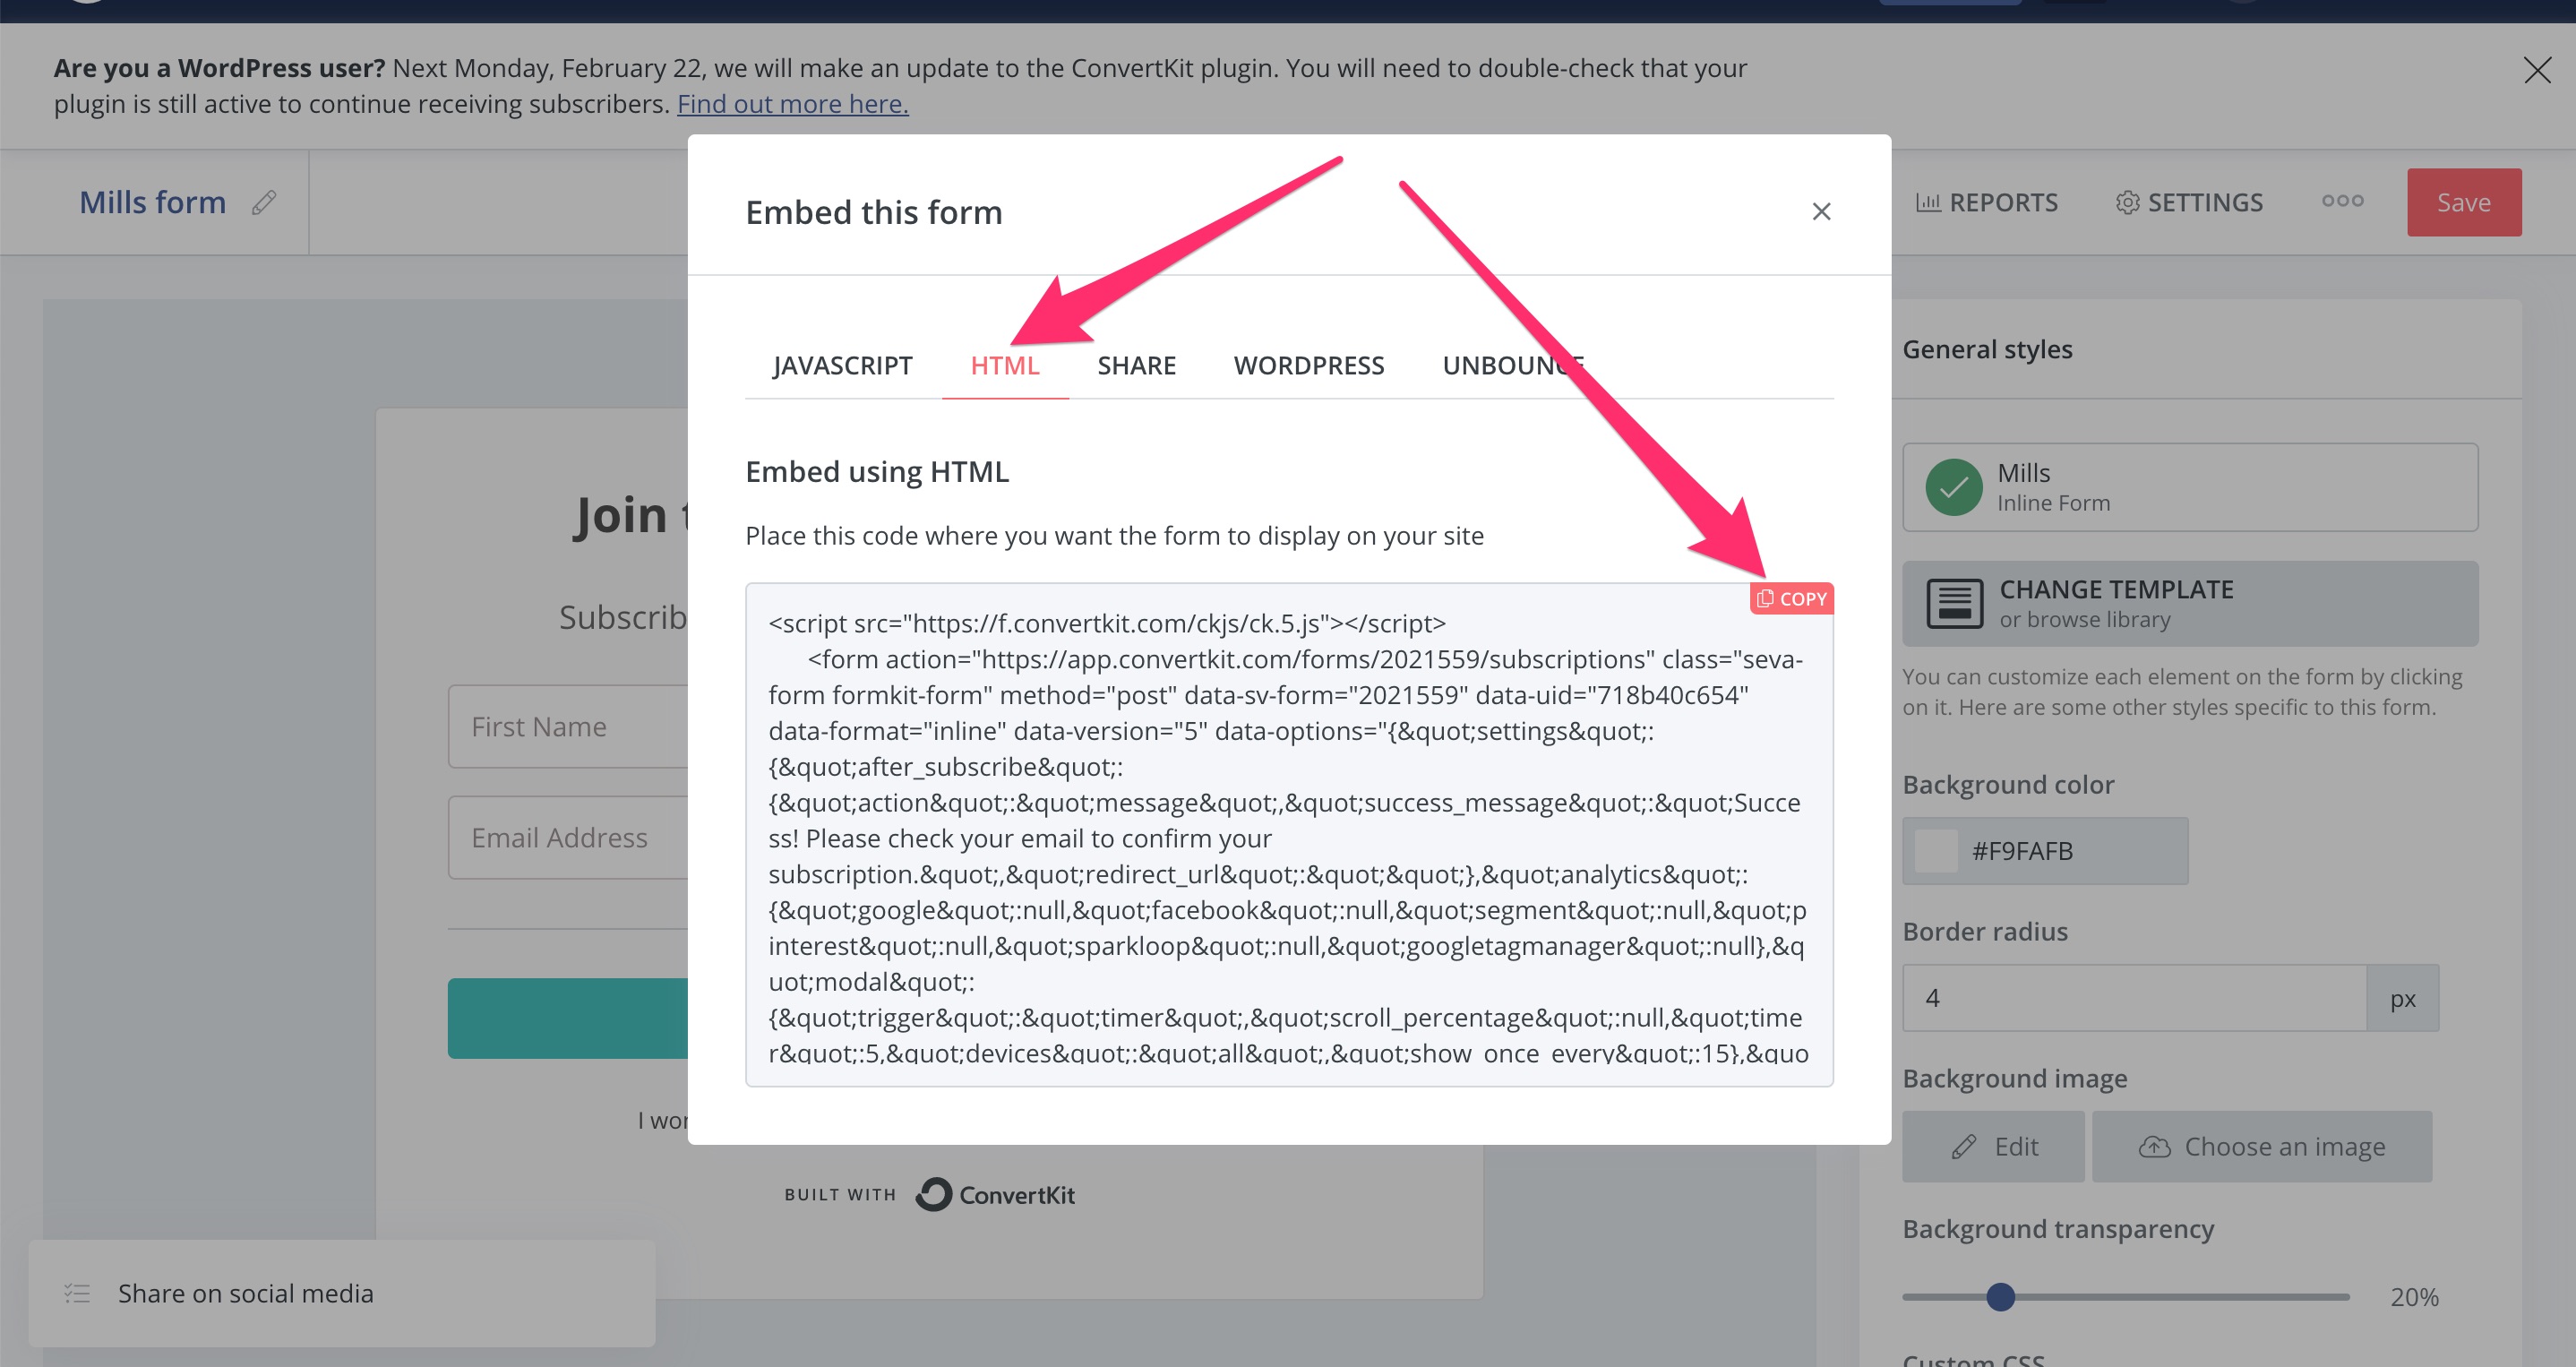
This opens up a modal. Click on the HTML tab within the modal and you will see the embed code. You need to copy this code to the clipboard, and for that, you can click on the conveniently placed Copy button as seen here:
Create a widget in Hashnode
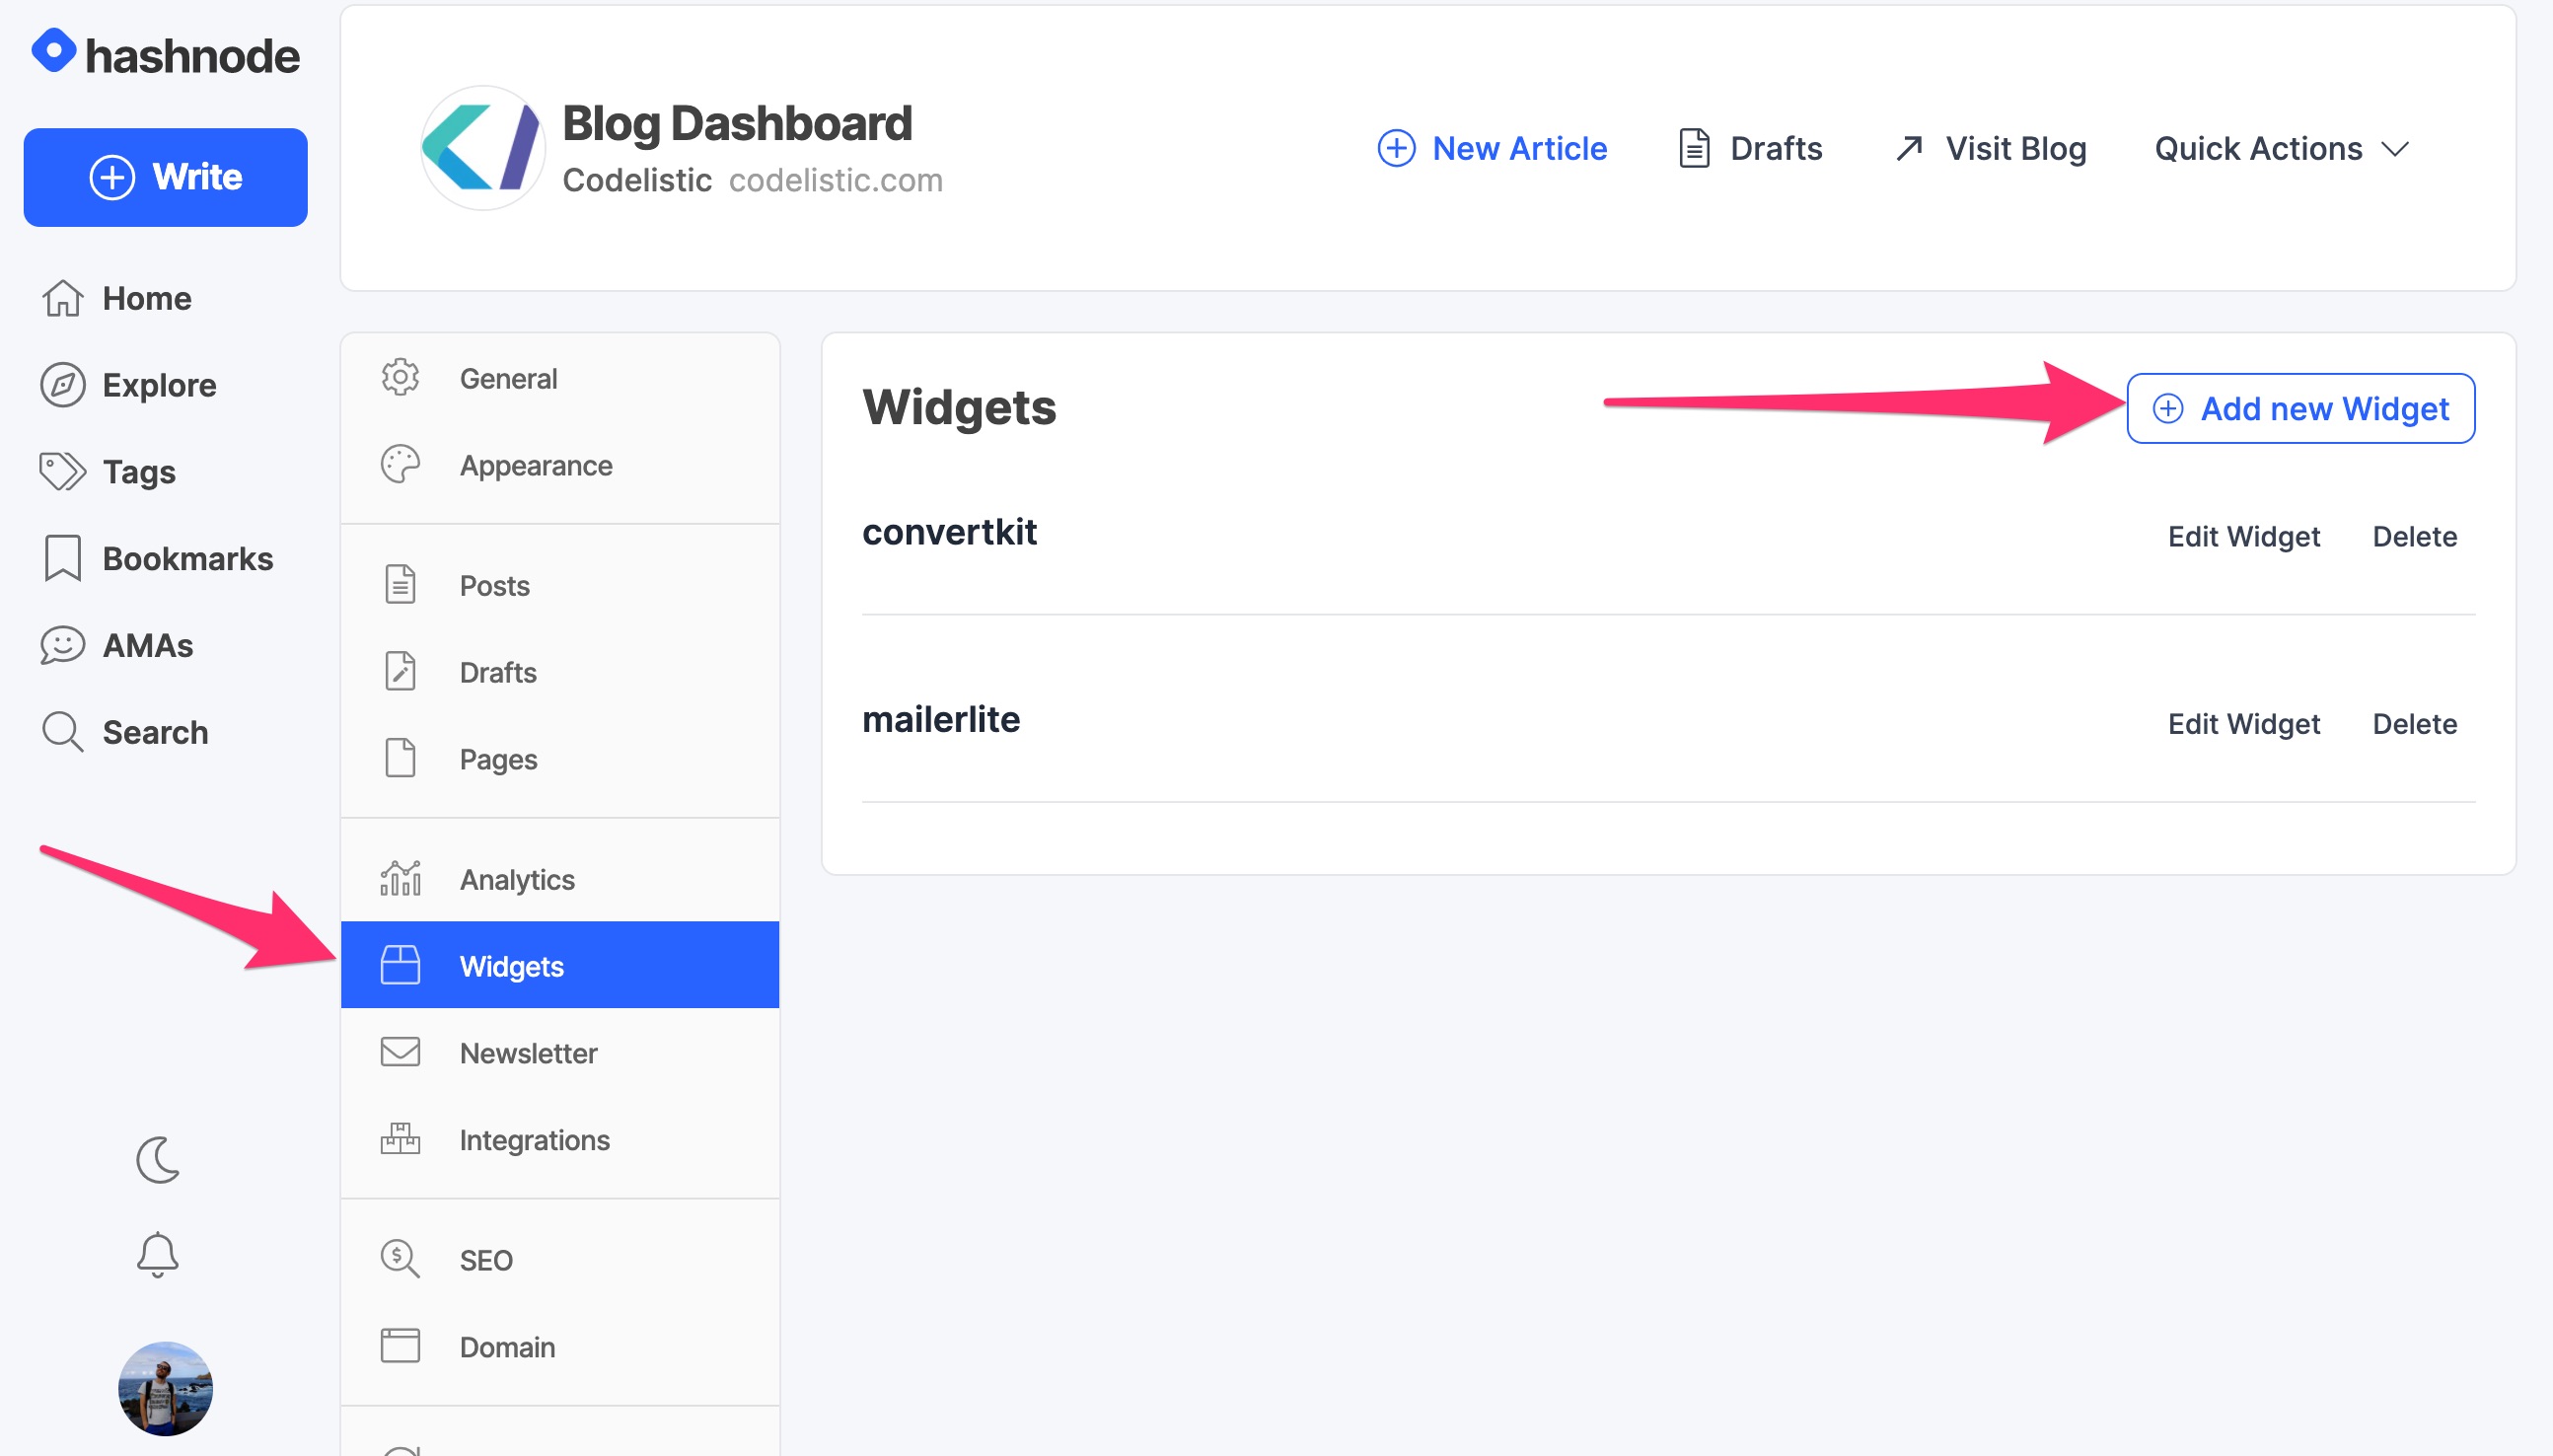
Now let’s head over to your Hashnode Blog Dashboard and click on the Widgets tab in the panel on the left. This opens up a Widgets section, where you should click on the Add new Widget button to create a new widget.
Now paste the embed code you copied from ConvertKit in the text field provided and give a name to be used for your Widget ID within Hashnode.
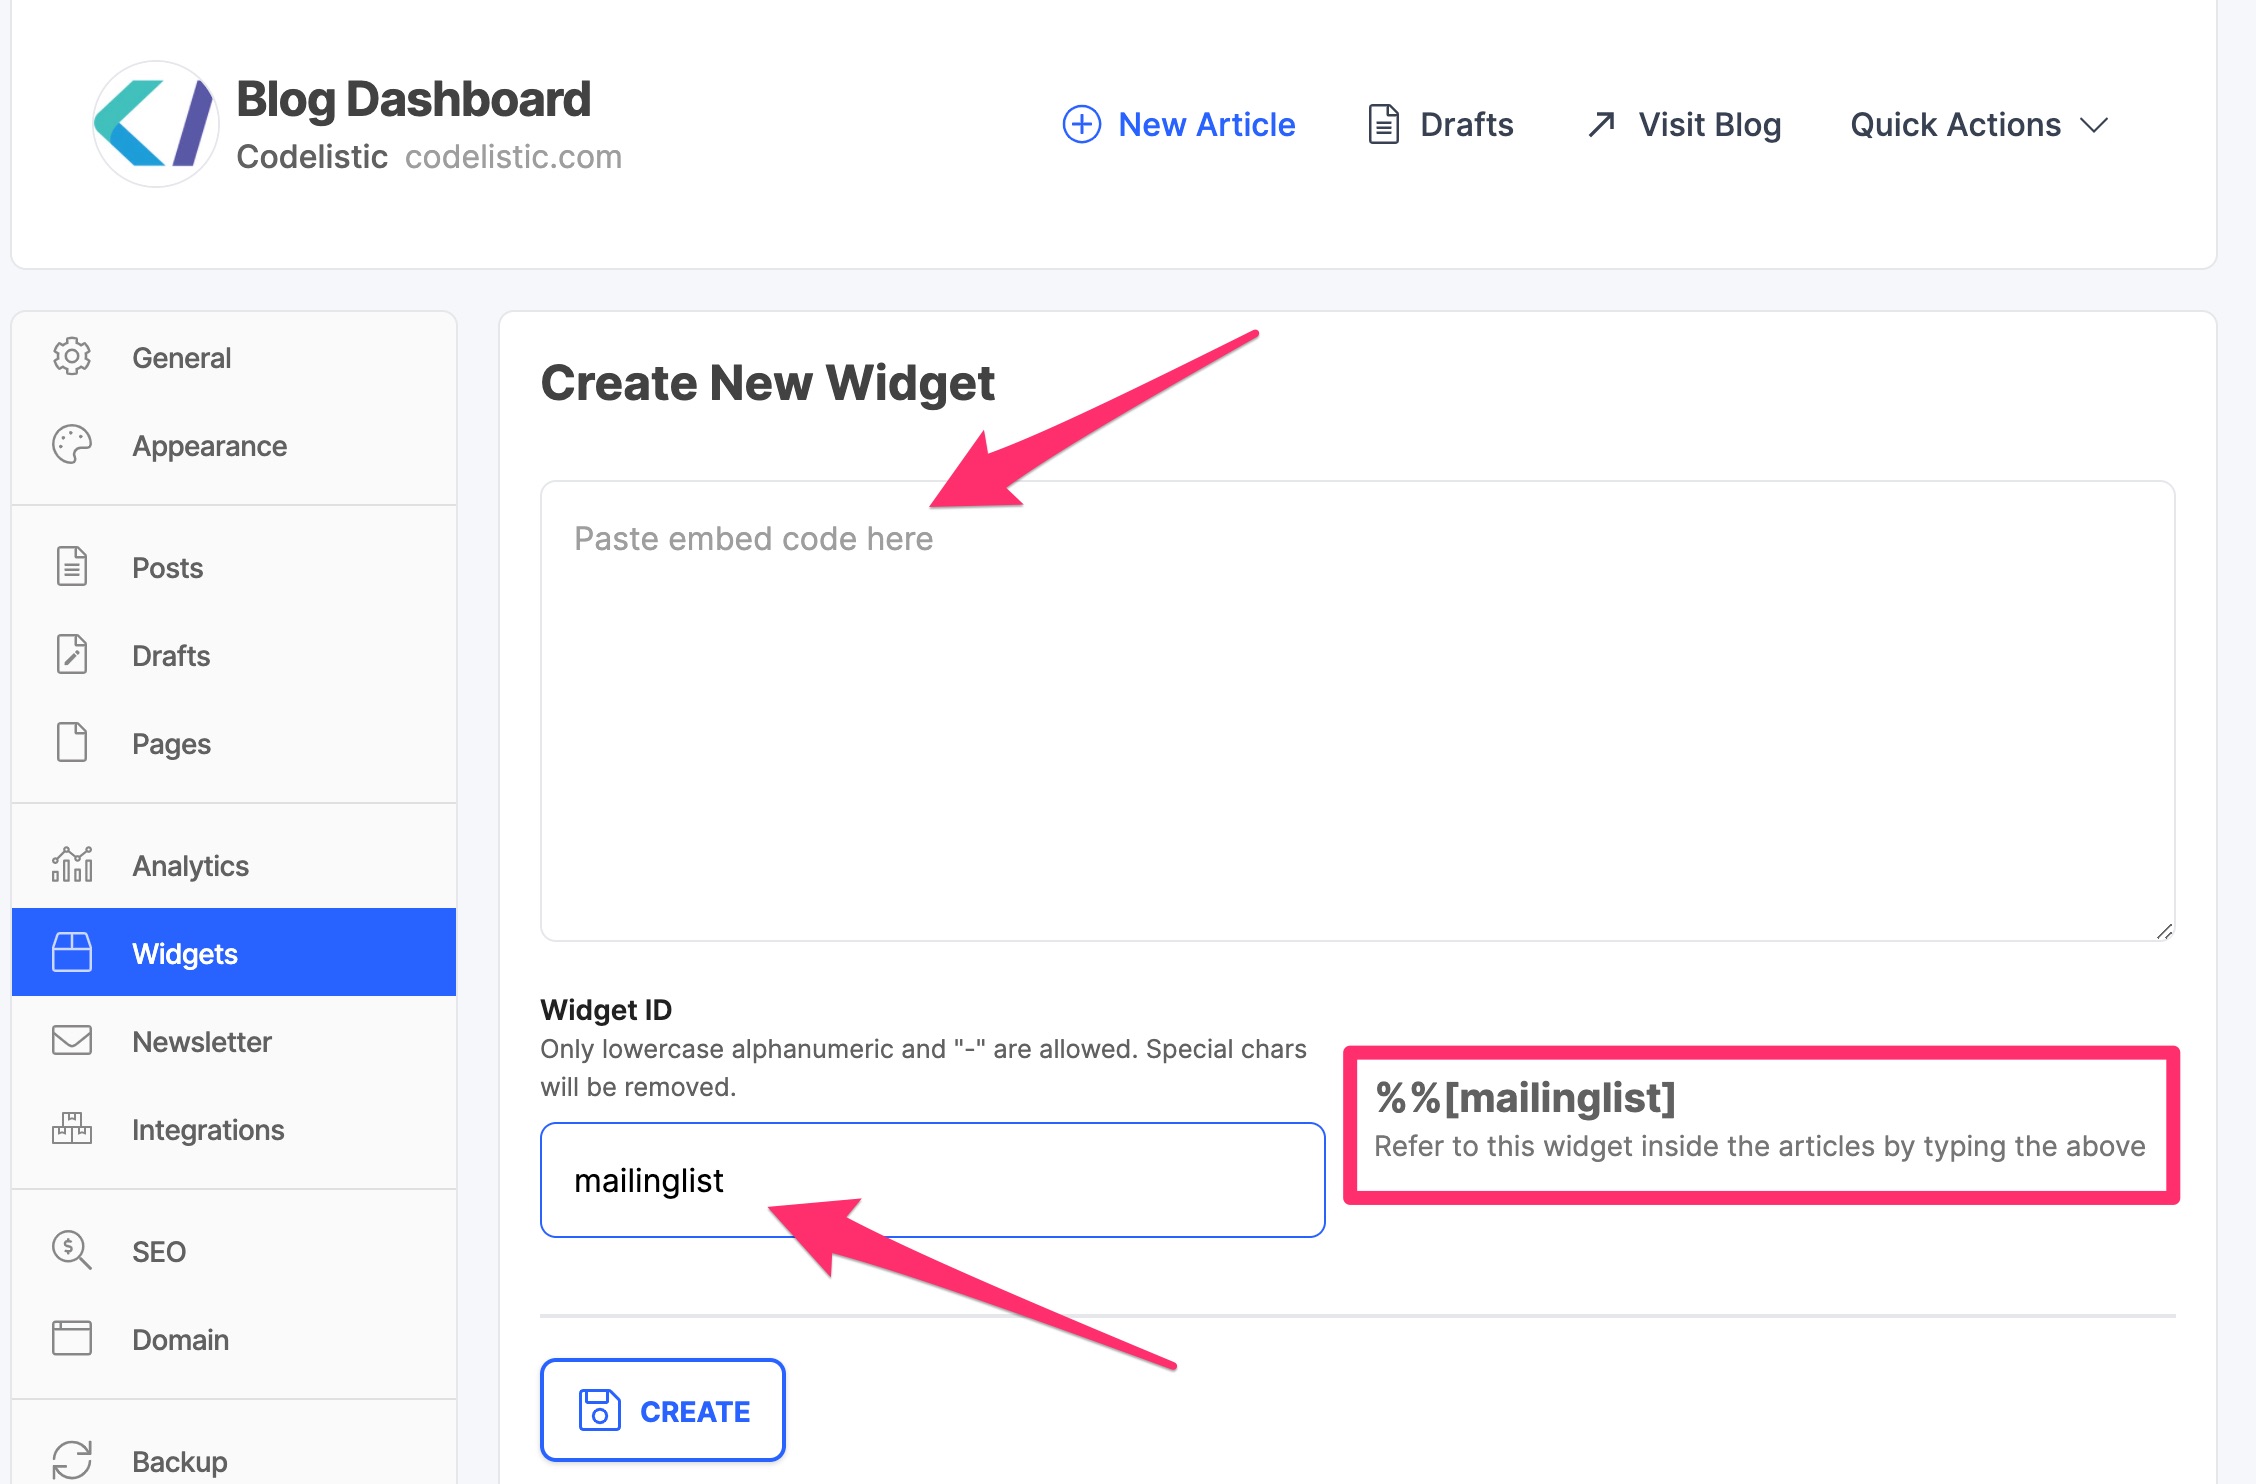
Here I chose “mailinglist” as my widget identifier. Notice how on the right it’s described how you can include the widget in the content you write anywhere on your blog by using the %%[mailinglist] tag.
Now click on the Create button to create your new widget. It’s ready to be used!
Use the new widget on your blog
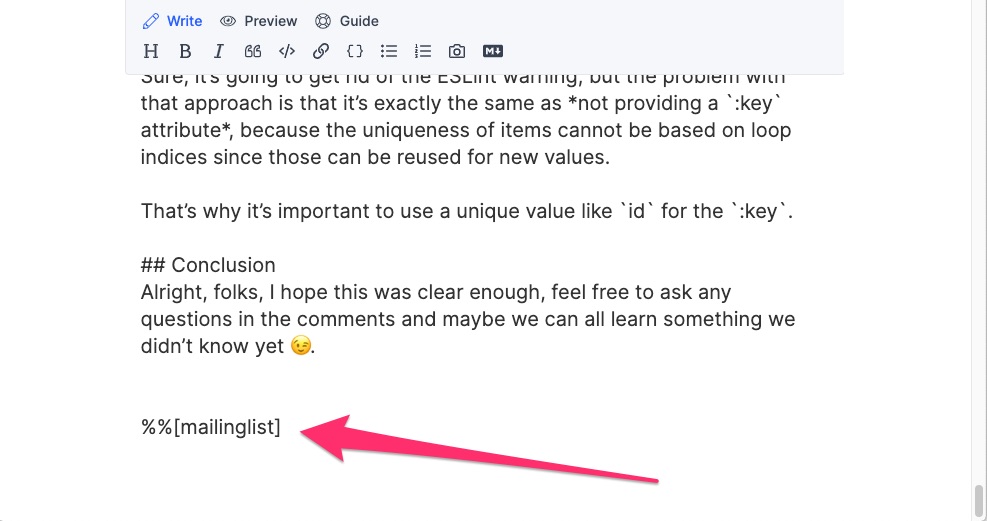
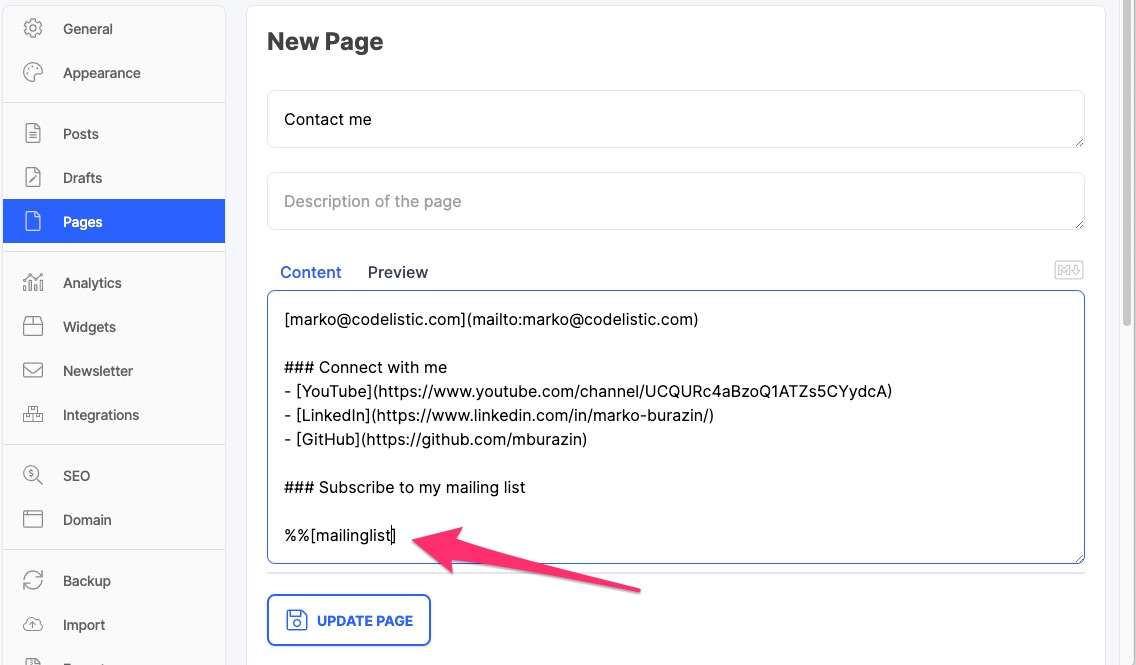
Now you can show your mailing list signup form anywhere on your blog site. For example, you can use it in any of your posts by including the %%[mailinglist] tag when you write the content anywhere you choose, like this:
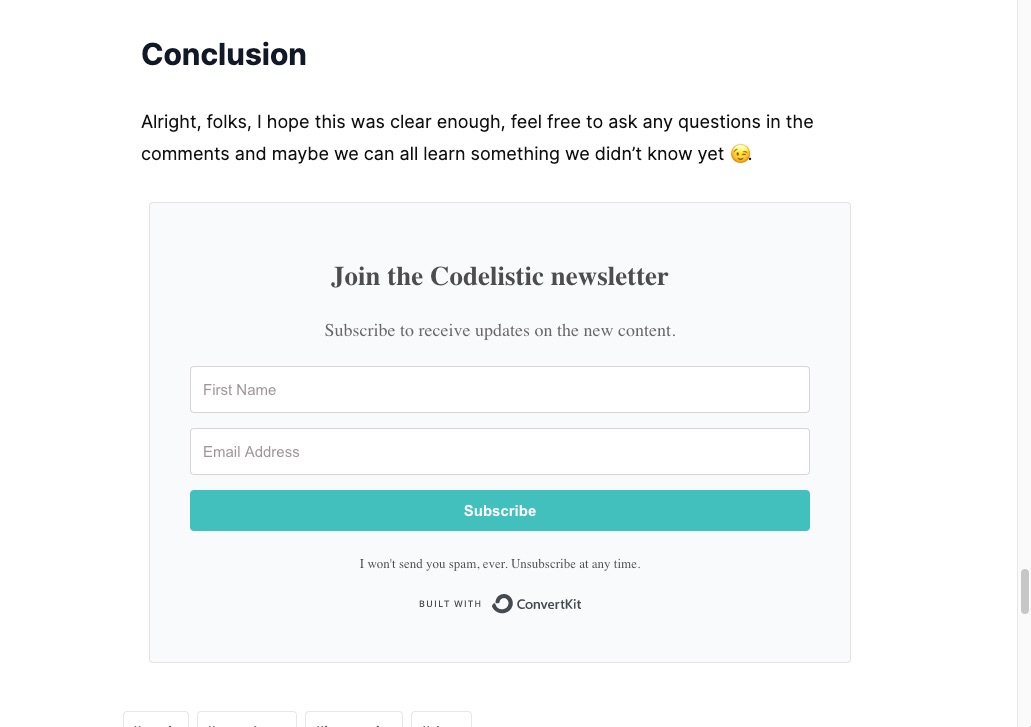
After you save the post, you can see the signup form in your article:
You can use the same approach to include this signup form anywhere else on your blog site. Like other pages which you can add and edit in the Pages section in your Blog dashboard.
Conclusion
The process described in this article works pretty much in the same way if you want to use other mailing lists as well. Don’t skip on the invisible reCaptcha to avoid potential security issues.